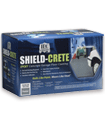
2-part Epoxy Garage Floor Coating

Apply Shield-Crete® Epoxy Concrete Garage Floor Coating for a thicker coating that hides imperfections like cracks or unsightly stains. Available in 4 popular colors, and optional flakes, this DIY-friendly product is water-based.
RECOMMENDED PRODUCT AND HOW-TO:
Product Supplies
- 3/8 inch Purdy® White Dove nap roller cover; disposable nylon or polyester brush for cutting in
- Paint tray/liner
- Pressure washer or regular garden hose with a high pressure nozzle
- Stiff broom brush
- Bucket to mix cleaner/degreaser with water
Product Preparation
Bare Concrete: Newly poured concrete must cure for 28 days. All surfaces must be clean, dry and free of grease and oil, and powdery residues.
Remove all foreign substances by scraping off any debris so the surface is smooth, yet porous. Clean and degrease using the enclosed packet to (2) gallons of hot water in a bucket, mix until it is thoroughly dissolved. Pour over the surface using a broom/mop to flood all areas, then let it sit for 10-15 minutes. Thoroughly scrub the entire surface with a stiff broom brush. Rinse thoroughly (sometimes 3-4 times) to ensure all cleaner is out of concrete. Are there still suds when you hose it down? If so, rinse it until no suds are visible.
*Older, stained, or highly polished concrete may need to be sanded or cleaned with a wire brush prior to cleaning to promote adhesion.
*If a garage application, to promote even BETTER adhesion, use 100-grit sandpaper to the areas where the tires will sit prior to cleaning. Epoxies need something to “bite” to, this will help in resisting hot tire pick-up.
**You want the floor to feel like 100 grit sandpaper before you coat.
Product Application
Thoroughly mix part “A” and part “B” separately in their individual cans before pouring part “A” into part “B.” Use the included stir stick to combine the two components together until completely mixed. Be sure to mix from the bottom up and vice versa to ensure complete activation. A low-speed electric drill and a paint mixing paddle can be used also, if available. However, do not use a high-speed mixer, this will create unwanted air bubbles.
An optional (yet highly recommended) non-skid additive packet is included in every kit. Stir this into the mixture to reduce the risk of slipping under wet conditions. Periodic stirring of the entire mixture is necessary to keep the additive from settling.
(*However, if H&C Shield-Crete Acrylic Clear Glaze is desired over H&C Holographic or Deco-flakes, use the packet to stir into that coating instead).
Roll H&C Shield-Crete Epoxy Concrete Garage Floor Coating evenly and consistently in 4 foot by 4 foot sections, back rolling to ensure color uniformity.
If H&C Holographic or decorative flakes are desired, toss them high into the air onto the wet epoxy. The higher you toss the flakes, the more evenly they will fall onto your surface. Do not “chicken feed” the flakes, this will result in clumps or patches of flakes, instead of evenly dispersed. Leave a wet edge of H&C Shield-Crete where you can recoat the next section without disturbing the flakes that have already been broadcast.
- Two coats are recommended for commercial applications.
- Recoat at a minimum of 8 hours.
- H&C Shield-Crete is dry to the touch in only 3-4 hours, light foot traffic is acceptable after 8-12 hours.
- Full heavy traffic is acceptable after 72-96 hours.
